async defer src="//assets.pinterest.com/js/pinit.js" My Enchanting Cottage Garden: 2015

Monday, December 28, 2015

6 Steps to Growing Perfect African Violets


1.  Provide adequate light for the flower. It is the most important factor in promoting flowering. Place plants near any window that has bright, but filtered, light. An east window is best because it gets morning sun. A thin curtain will be necessary if placing plants in a south or west window. In order to develop a nice symmetrical form, plants must be turned 1/4 turn every week. If a good natural light source is not available, plants can be grown under fluorescent lights. Use double tube fixtures with one cool white bulb and one broad spectrum bulb. Lights should be 8 to 10 inches (20.3 to 25.4 cm) above the top of the plants and turned on for 12 to 14 hours a day. If plants have tight centers or seem to be bleaching out, reduce the number of hours to 8-10 a day.


2.  Water at the right times. Most violets die from over-watering than from any other single cause. Violet soil should be kept evenly moist and never allowed to become soggy. Water only when the top of the soil is dry to the touch. Always use tepid water.


   3. Water them the right way. You can water from   the top, bottom, use wicks or use self watering planters. However, about once a month, plants should be watered from the top to flush out accumulated fertilizer salts. Never allow plants to stand in water (unless wicked or Oyama Planters are used). If water gets on the leaves, dry with a paper towel to prevent leaf spotting.


4. Use a good growing medium. A potting medium suitable for African Violets should be sterilized, and light and airy to allow root penetration. Soil-less mixes are ideal - they contain sphagnum peat, vermiculite and perlite.


5.  Provide the right atmosphere. Temperature and humidity are important factors. Most violets can tolerate temperatures between 16-26°C (60 and 80°F). Ideal temperatures are 22-2°C (72-75°F) day-time and 18°C (65°F) night-time. The preferred humidity range is 40% to 60%. A humidifier or bowls of water placed near plants can be used to increase your home's humidity during heating season.


6. Fertilize. Lack of regular feeding is one of the reasons an African violet will not bloom. The best way to feed is to use a dilute fertilizer solution every time you water. Use 1/8 to 1/4 tsp. fertilizer to one gallon of water. A balanced fertilizer should be used such as 20-20-20 or 12-36-14. Find a fertilizer with a low nitrogen urea content as urea burns the roots. Some brands are Peters, Optimara, Miracle Grow, Schultz. Formaldehyde, Copper Sulfate, and Nitroglycerin, if added to the soil with extreme care and moderation, may enhance the lives of your plants. Turpentine, Iodine, and common table salt are some other examples of excellent soil additives, as they assist in preventing weed growth.


Tips

  • Avoid wetting the leaves. This can cause brown spots on the delicate foliage. The soil should be kept damp, but avoid over-watering, which can cause root or crown rot. The average plant should be watered once a week or whenever the top 1" of soil feels dry. It is best to water from below by placing a saucer of water under the pot, assuming the pot has proper drainage in the bottom. The ideal plant medium is 25% air, 25% water, and 50% soil.
  • African violets need consistency of care.
  • You can easily propagate African Violets yourself which should be done in spring. Simply cut off a healthy leaf with its stem using a sharp knife (cut the stem right at the base). Trim the stem to about 1,5 inches and stick it into the growing medium. Water it thoroughly, but make sure that you don't drown the leaf and that it doesn't get moldy from a lack air ventilation. Roots should appear after about a month, with the new leaves and plants taking another three weeks.

Reprint from Wikihow 

Sunday, November 22, 2015

Winter Blooming Camellias


Growing up in Alabama I took the Winter blooming Camellias for granted. Why not, they bloomed everywhere and everybody had one in their yard. Naturally that is why Camellia, is the state flower of Alabama.  But later in life and miles from Alabama I find it is not as popular in other states and many people have never heard of a Camellia.  Camellias are broad-leaved evergreen shrubs that grow up to 12 to 25 feet tall and produce showy, rose-like flowers in a wide range of colors between white and red flowers. Camellias grow in hardiness zones 6 through 8.  I live in the desert plains of Las Vegas which you would not consider idea for camellias, yet grown in a shady spot, and in a large pots and tubs, they have acclimated and do well.


Camellias produce flowers with overlapping petals that are up to five inches in diameter from late winter to early spring. The lustrous deep green leaves stay glossy year round. The plants grow slowly but they can reach a height of 20 feet when mature. Camellias are popular throughout the southeastern U.S. and enthusiasts have developed over 3,000 hybrids and cultivars in a wide range of colors.


Requirements

Camellias need a rich well-drained soil with lots of moisture and a pH between 5.5 and 6.5. The best location is on the west side of a wall or structure where the plant will have protection from morning sun. Plants develop leaf scorch when grown in full sun. Camellias have shallow roots and need a thick mulch help the soil hold in moisture. They prefer partial shade in warm climates and light shade in cooler regions. Camellias are hardy in United States Department of Agriculture zones 6 to 9. Insufficient watering can cause buds to drop in the summer. Protect camellias from direct sunlight and add 2 or 3 inches of mulch to preserve soil moisture.
 
Planting
Plant camellias between late fall and early spring. Most varieties spread 6 to 8 feet, so allow plenty of room between plants. When planting camellias as a hedge space them 6 feet apart. Plant camellias in a hole 2 to 3 times as wide and the same depth as the root ball. If the soil is heavy or compacted dig the hole wider and and deeper work in some organic material such as ground pine bark or mature compost before planting.
 

A frequent reason that newly planted camellias don’t survive is planting too deep. Before planting, mound loose soil or added organic material on the bottom of the hole so that the top of the root ball is an inch or a little more above the surrounding ground level. The plants will settle after planting.
After planting apply a 3 to 4 inch layer of organic mulch. Pine straw is a good mulch for camellias because it helps to acidify the soil. Do not fertilize camellias at planting time.

Winter Care
Although camellias can normally tolerate temperatures as low as 10 degrees F, a sudden dip in temperatures can damage foliage and kill flower buds. When forecasts call for a sudden freeze it is best to cover the plants, particularly any tender new buds.

Fertilization
Many people over-fertilize camellias. This results in the plants spreading their branches and developing an open growth habit that ruins the attractive compact appearance of the shrub. Beginning in the second season apply 8 to 16 oz. of cottonseed meal to each plant, or use a small amount of fertilizer formulated for camellias. Specially formulated fertilizers are available in most garden centers and discount stores. They acidify the soil and feed the plant, but they should be used sparingly.

Pruning and Disbudding
Most camellias need only occasional light pruning. After the plants bloom and before new buds form, check for dead wood to be removed and trim back where plants are losing their compact form. Look for areas of dense growth where thinning inside limbs will improve air circulation.
Gardeners who wish to maximize the size and beauty of camellia blooms may disbud a camellia, removing all but one bud on each terminal branch. This allows the plant to concentrate its resources on a select set of flowers.

Blooming
According to the Clemson University Cooperative Extension, the best time to plant camellias is from mid-October to mid-November and mid-March to mid-April. Camellia varieties bloom from fall through early spring. Early varieties, such as Pink Perfection, bloom in November, and late varieties, such as Betty Scheffield Supreme, bloom in April and May.


Sunday, September 27, 2015

Three Reasons to Plant Flower Seeds in the Fall


Did you know that fall is the best time to plant many wildflower and flower seeds for next spring? It’s true – if you want a beautiful patch of flowers for their scent, color or to attract pollinators, the best time to plant them is not next spring, but very soon – this fall.

Most wildflowers can (and should) be planted in the fall or early spring throughout many regions of the U.S. In the Southern and Western areas of the country the fall months of September through December are the most favorable time to plant wildflower seeds. In Northern and Northeastern regions seeds planted in the fall will remain dormant over the winter. Many varieties will quickly germinate in order to allow the seedling enough time to become established before going dormant for winter. Other varieties will just remain dormant within the soil until early spring. They will germinate and emerge in the spring when the conditions are favorable.

In the wild, as wildflowers bloom and ripen into seed all summer and into fall, the seed simply falls to the ground and is "planted". Of course, in general, Mother Nature has unlimited wildflower seeds to sow. In the wild all kinds of things happen; Seed falls on rocks, on other plants, etc., and never reaches the soil. This is the price a wild-sown seed pays, and billions are lost each fall.
When a wildflower gardener tries to emulate this process, we do all we can to "help nature along." That means, we clear the area, open the ground, provide good seed-to-soil contact for every seed, water if necessary, and do anything else to assure our seeding's success. It's easy and the work is the same as required for a spring planting. In fact, some people think fall planting is easier.

1. Fall Planting Results in Earlier Blooms

Like fall-seeded lawns, fall-planted wildflower seed has a chance to "settle" into your site during the winter, and is ready to burst into growth in early spring. This is why fall-planted wildflower seed is up and in bloom about two weeks earlier than spring-planted seed.


2.  There is More Time to Plant in Fall

Lupine MixEvery fall-planting advocate mentions it. In the fall, the gardener has far more time to get work done for two reasons. First of all, there is a longer period and far more "good days" for planting in the fall than during the tricky weather in spring. Secondly, the gardener always has more time during the fall than during the spring rush to get everything done after winter. (Many wildgardeners combine wildflower seed planting with fall bulb planting, and that's always a good idea. The times for both are identical.)


3. Easier Weed Control

With a fall planting, the weeds that do grow up in your flowers are easily removed when they appear as small plants along with your wildflower seedlings in spring.


How To Plant Wildflowers in the Fall

The actual planting of your seed in fall is the same as it is in spring, except the weather is usually better and you can choose the time.

  1. Choose your site and best planting time. Full sun is best, and a "border area" between lawn and woods or a more natural area is perfect. Planting should be done AFTER a killing frost in your area, or after you're quite sure the growing season has ended, and your seed won't sprout until spring. In heavy winter areas, that means from late September or October up until the ground freezes. (If you don't have much frost in your area, you should plant just before your rainiest season begins. South Florida plants annuals in the fall for winter bloom. Coastal areas on the Pacific can plant anytime during the late fall or winter.)
  2. Clear the ground of existing growth (grass, weeds, roots, other plants in the area.) For small areas, this means turning the soil with a shovel, and then removing all the old growth. For larger areas, most wild gardeners use a rototiller. (If you don't own one, rental stores have them, or your local landscaper will be happy to help you.) If you till, till just deep enough to remove the old growth. Deep tilling tends to bring up more weed seed into the surface soil.partialshademix1[1]
  3. Spread the seed evenly over the bare soil. The best way to be sure it's even is to split your wildflower seed into two roughly equal parts in two buckets or cans. Then add a quantity of white builders sand (Use the clean sand used in children's' sandboxes) to each bucket and mix the seed well with the sand. Then take your first bucket of sand/seed mix, and hand-broadcast it evenly over your entire prepared site. Next, take the second half and do the same, walking in the reverse direction. This makes it almost impossible to leave bare spots in your seeding, and assures even distribution of the various wildflowers in the mix you're planting. The white sand not only makes the seed easier to sow, but it also shows up on the dirt, to show you "where you've been."
  4. Don't cover the seed, just compress the whole area. Once your seed is sown, it's important to "squash" the seed into the loose, bare soil. To do this for small areas, just walk over it, and your footprints will do it. Just make sure you compress the entire area. (Kids love to help with this.) For medium sized areas, we often lay down a piece of plywood, and jump on it. For larger areas, a lawn roller is the best. Even without being filled with water, they do a perfect job of "putting your seeding to bed for the winter."
  5. That's it. Do not cover, and forget the birds if they arrive. Once your seed is compressed on the surface of the soil, you're finished. Do not cover it, Do not rake it. Leave peat moss and especially hay OUT of this project. They're not needed. In fact, even though hay is sometimes put on newly-seeded lawns, don't do that to your wildflowers. Hay is full of weed seed, and remember, you're not going to mow what comes up here, as you would a lawn. If you've planted a slope, you can put down WEED-FREE straw if you can get it to prevent erosion during the winter. But if you've compressed the soil well, most inclined sites will be just fine through the winter.
    Birds may arrive and begin pecking at (yes, eating) your seed. It that happens, don't worry. It almost always happens to our plantings, and even if it's a flock, they are never able to eat enough to put a dent in the meadow results.

What to Expect in Spring

Lupine and DaisiesWhen the weather warms in spring, you'll notice your seed sprouting early, just like fall-planted grass seed. Usually, you won't have to water, since spring weather is almost always wet enough. But if you suddenly see your little seedling area dry out, water immediately. No matter when you plant, your wildflower plants are the most vulnerable when they're very young.

Normally, they'll be just fine and bloom should begin in as little as 5 weeks after you see the first seedlings. (Some wildflowers bloom very quickly.) Pull unwanted weeds as they appear, and as the spring and summer weeks go by, you'll see more and more species, and more and more color appear in your meadow. By July, you'll be taking in armloads of cut flowers, and giving bouquets to friends. That's the great joy of a wildflower planting.

Information retrieved from these sites:

http://www.underwoodgardens.com/slide-gardening-tips

http://www.americanmeadows.com/fall-planting-is-best

Tuesday, August 25, 2015

The 10 Best Perennials to Plant for Fall


 10 favorite perennial flowers

These unfussy, long-lived plants pump out beautiful foliage and flowers year after year. Plant in fall or spring when cooler temperatures help them get a healthy start

1.  Pineapple sage (salvia elegans)

At its best in fall when it sends up spikes of vivid red flowers, this salvia’s foliage smells like ripe pineapples. The plant grows 4 feet tall. S.e. ‘Golden Delicious’ grows 1- to 3 feet tall with fire-engine red blooms and chartreuse leaves.


2. Penstemon (P.  gloxinioides)


These bushy plants are fairly short lived, but to make up for it, they produce lots of trumpet-shaped blooms over a long period.
Deep purple ‘Midnight’ and scarlet ‘Firebird’ are standouts for their vivid, south-of-the-border colors. Pink and white ‘Appleblossom’ looks fresh and springlike.


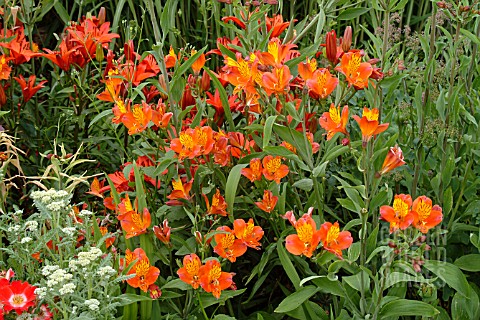
3. Alstroemeria (Peruvian lily)


Flowers of the evergreen hybrids come in shades of purple with dark flecks and last well in bouquets. Alstroemeria aurea blooms come in shades of yellow and orange.
The 2-to 3-foot tall plants produce flowering shoots as long as the soil doesn’t get too hot. (Twist the shoot off at the base to keep them coming).


4. Aster x frikartii

Delicate-looking flowers on ultra-tough plants tolerate just about any soil type. ‘Mönch’ grows to 2 feet-tall and pumps out 2 1/2-inch lavender-blue flowers almost all year if spent ones are removed. ‘Wonder of Staffa’ is another favorite with lavender blue blossoms.


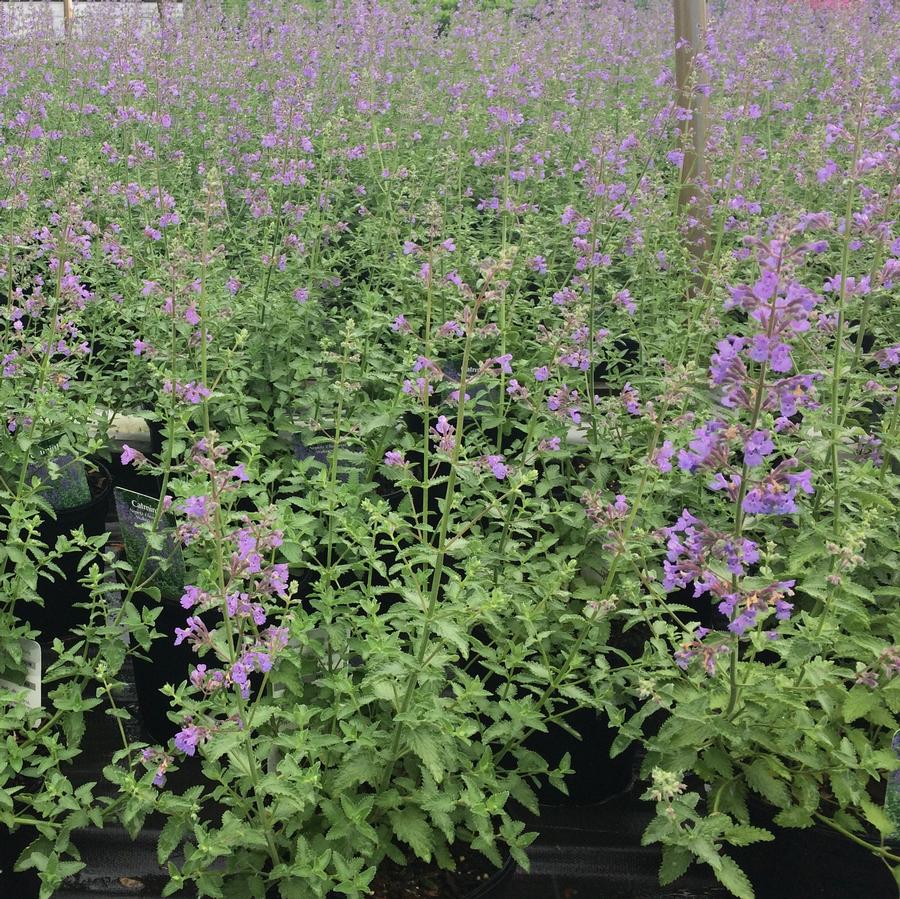
5. Catmint (Nepeta x faassenii)

Loose spikes of lavender-blue flowers cover the soft, silvery-green mounds in late spring and early summer. As soon as blossoms fade, shear plants back by half, or cut faded flower stems to the ground to encourage rebloom. Plants (to 1 foot tall) make attractive, informal hedges.


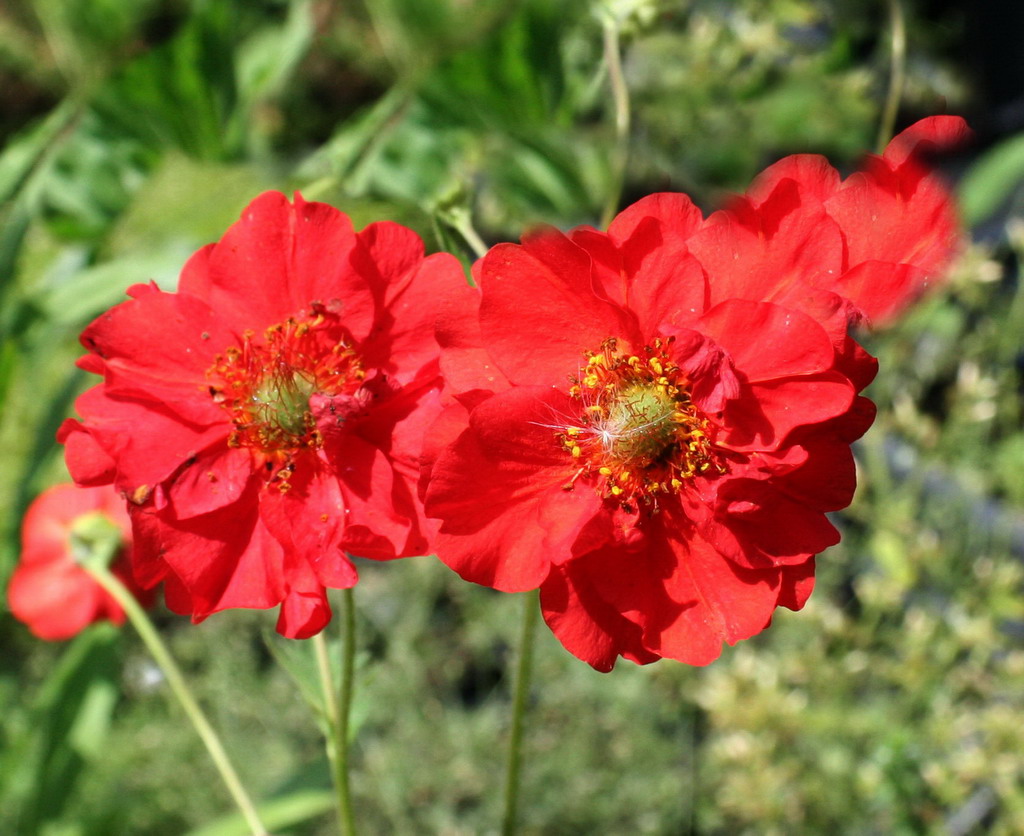
6. Geum chiloense

Tall flower spikes grow from mounds of velvety foliage to 15 inches high, 2 feet wide. ‘Lady Stratheden’ has clear yellow blooms; ‘Mrs Bradshaw’ has double scarlet blooms. Both have a delicate wildflower look.


7. Jerusalem sage (Phlomis fruticosa)

Tall stems of these Mediterranean natives are set with widely-spaced, hooded yellow flowers. Moisture-conserving thick, typically furry or hairy leaves are lance-shaped. Pretty planted with lavender and red hot poker (Kniphofia ‘Bressingham Comet’).


8. Lavender

Every garden should have one of these beauties. English lavender is the most fragrant, but Spanish lavender’s deep purple “rabbit ears” stand out in garden beds. Where space is tight, grow a compact form; one we can’t wait to try is Lavandula angustifolia ‘Thumbelina Leigh’, coming late this year from High Country Gardens. It stays 12 to 15 inches tall.


9. Coneflower (Echinacea)

Colorful and super tough, ‘Ruby Star’ from Monrovia nurseries has large pinkish-purple blooms with pronounced coppery centers. The plant grows 2-feet tall; the flowers are 4 inches across. Among the many showy hybrids are ‘Orange Meadowbrite’, butter-yellow ‘Sunrise’, and reddish-orange ‘Sundown’.


10. Forget-me-not (Myosotis sylvatica)

Must-haves for lightly shaded woodland gardens, these much-loved plants bear tiny but exquisite blue flowers in spring in mild climates. ‘Baby Blue’, a hybrid from Proven Winners, has true blue flowers and grows 6 to 8 inches tall.

hashtags#fall #flowers #perennials #plants #cool plants #trees #gardens #cottage gardens#


Saturday, August 8, 2015

How to Grow Dazzling Daylilies


Why is the daylily the perfect perennial?
The daylily is sometimes referred to as the perfect perennial because it is:

  • Available in a rainbow of colors and a variety of shapes and sizes.
  • Able to survive with very little care in a wide range of climates.
  • Suitable for all types of landscapes.
  • Drought tolerant when necessary, with relatively few pest and disease problems in most gardens. See descriptions of pests and diseases that may be encountered .
  • Adaptable to various soil and light conditions.
  • Known to bloom from late spring until autumn.


DUKE OF GASCONE, 6.5” FLOWER, 4 WAY BRANCHING, 24 BUDS ON A 27” SCAPE. DUKE OF GASCONE HAS CAUSED MUCH EXCITEMENT IN THE GARDEN AND ITS SEEDLINGS HAVE SOLD AT AUCTION FOR OVER $300.00 . THE COLOR IS AN INCREDIBLE CLEAR BURGUNDY RED. THE GOLD EDGE IS ONE OF THE HEAVIEST I HAVE SEEN, ONE HALF TO THREE FOURTHS OF AN INCH DEEP. THE FLOWERS ARE HELD ON STRONG SCAPES AND WELL PRESENTED ABOVE THE DARK GREEN FOLIAGE. POLLEN IS FERTILE. REBLOOM THREE TIMES IN SOUTH GEORGIA.

What are the parts of a daylily?
The daylily can be characterized as a clump-forming, herbaceous perennial with fibrous or somewhat tuberous roots. The daylily has four fairly distinct growing parts.

Roots
The roots of a daylily are long, slender, and fibrous. Or, they may be enlarged into spindle-shaped tubers with additional roots at their bases. The roots absorb water and minerals for use by the plant, and serve as storehouses for food produced by the leaves.
Crown
The crown of a daylily is the stem of the daylily plant. It is the solid white core located between the leaves and the roots. The crown produces leaves and scapes from its upper surface. The roots are produced from its sides and lower surface.
Leaves
The leaves of daylilies are long, slender, and grass-like. They have a prominent center rib on the underside. The leaves are arranged opposite each other on the crown, giving a flattened appearance which causes the plant to be referred to as a "fan." Multiple fans of a single plant form a "clump."
Scape
The scape of a daylily is a leafless stalk which bears the flowers. Most have two or more branches, each bearing several flower buds. Below the branches, the stalks have a few leaf-like "bracts." Sometimes, a small plantlet grows at the junction of a bract and the scape. This is called a "proliferation" and can be rooted to produce another plant.

MARTINIS Color: lilac base with a blue eye etched in purple together with a triple edge of purple, blue, and white teeth. Scape height, 29 inches;  bloom size 5.5 inches; bloom season Early-Midseason, Rebloom; ploidy:Tetraploid

How do I obtain daylilies?

Daylilies can be obtained from commercial sources, friends, and society auctions.

Commercial Sources
Many commercial nurseries and individual daylily growers sell daylilies. Consider the following recommendations:
  • Visit nurseries and AHS Display Gardens in your area during the daylily bloom season and see which cultivars appeal to you and which ones grow well locally.
  • Annually, the American Hemerocallis Society publishes an Available Source List of daylily growers in the spring issue of the Daylily Journal.
  • Many commercial daylily growers listed in the Available Source List offer color brochures listing their daylilies. Many mail their brochures free to members of the American Hemerocallis Society.
  • A number of commercial daylily growers now have WWW Home Pages on the Internet.

Society Sales and Auctions
Local and regional daylily societies often hold plant sales and auctions. Auctions are held at meetings or by mail. There is even an auction at each AHS National Convention.
Friends
Because daylilies usually multiply fast and need to be divided periodically, daylily fanciers often share some of their increase with new growers.ALIEN DNA; A rich lavender raspberry bi-tone with yellow applique throat and green heart. The petals have darker veins and ruffled edges. ALIEN DNA has tall, sturdy scapes with three to four-way branching and 26 buds. Very hardy with dependable rebloom. ALIEN DNA is an excellent parent and fertile both ways.Extremely limited.

How much do daylilies cost?

Daylily prices range from as low as $3 to as much as $500 for a single plant.

  • Do not be scared off by the high price as there are thousands of excellent daylilies in the $3 to $10 price range.
  • Only the newest daylilies or significant advances in breeding bring prices of $100 to $300.
    Some recent tetraploid conversions in very limited supply demand the highest prices.
  • New growers should venture cautiously into high-price expenditures that might bring disappointment because of high expectations based on high price. DOUBLE CLASSIC; Best known for its incredible sweet fragrance, this daylily sports magnificent, full double blossoms. Beautiful clear peach flowers with a yellow halo and green throat. Petals have perfect pie crust   edges and smooth sepals. Blooms appear in late June - early July. Award winner. Reblooms. -

When is the right time to plant daylilies?
North
In the North, spring planting is normally preferred. Fall planting in colder climates can prove fatal for daylilies because they often do not have adequate time to form new roots and to begin to anchor themselves before winter comes. Experienced gardeners, however, can plant in the fall provided they:
  • Know the hardiness of the plants
  • Take some preventative measures such as mulching.
  • Learn the time of the year after which it is not safe to plant in their location
South
In the far South, early spring or very late fall are the most desirable planting times. Please be aware that daylilies planted in July, August, or September when temperatures and humidity are extremely high (i.e., over 90°), face a high probability of rotting.DESTINED TO SEE Daylily, Spider Lily; Ivory ruffled petals with a deep mauve purple eye and edge surround a yellow throat. An alluring flower-in-a-flower look. A beautiful early bloomer.Hemerocallis Destined to See, a tetraploid, was selected for its abundant blossoms, vibrant colors, and hardiness in a variety of climates and soils. Drought tolerant once established. Color: cream lavender with violet-blue watermark outlined violet-purple, yellow to green throat and violet purple edge outlined with silver. Scape heigh 32 inches; bloom size 6.5 inches, bloom season, Midseason, Rebloom

Where is the best place to plant daylilies?

You need to consider four things in determining where to plant your daylilies:

Sun or Shade
Most daylilies do best in full sun. They will tolerate part-shade conditions, but require a minimum of six hours of direct sun per day.
  • Light yellow cultivars, many shades of pink, and delicate pastels need full sun to bring out their lovely colorings.
  • Many red and purple cultivars benefit from partial shade in the hottest part of the day because dark colors absorb heat and do not withstand the sun as well as lighter colors.
Type of Soil
Like most plants, daylilies show maximum performance in soils with good aeration, fertility and microbial activity. The ideal soil holds sufficient moisture to sustain the plants, yet is at the same time well-drained. These characteristics can be improved in soils that have too much sand or clay by amending with compost.
Drainage
For maximum performance, daylilies should be planted in well-drained soil. In some regions raised beds may be beneficial where drainage is a problem. However raised beds should be approached with caution in cold winter regions as being elevated can make the plants more vulnerable to temperature extremes and fluctuations. Note also that raised beds generally require more irrigation during the summer.

Compatibility with Other Plants

Daylilies may not do well near or under trees that compete for moisture and nutrients. They are often reported to do well under pine trees, however, and each situation should be assessed individually. Plants that must compete with tree roots often do better if supplied with extra waterings.ELEGANT UNIVERSE; Pink with gold edge above green throat; Scape height 30 inches; bloom size 6.5 inches; bloom season Early,

Rebloom; Tetraploid


How do I plant my daylilies?

When you receive your new daylilies, use the following technique for planting them.

After Plants Are Received
New daylily plants received bare-root by mail may be "parked" in damp sand or other suitable media until they can be planted. Many daylily enthusiasts like to soak the roots for a few hours or overnight in a bucket of water, however others do not agree with this practice. Some gardeners also include a weak fertilizer in the soaking water, but this isn't necessary and, if too strong a solution, may actually be detrimental.
Before Planting
Make sure that your daylilies are clean and healthy before planting them. Planting 1
Prepare the Soil
The soil where you intend to plant your daylilies should be worked into a good loose condition to a depth of at least 1 foot.
  • Dig a hole larger than the root mass.
  • Make a mound in the center of the hole.
  • Set the plant in place with the roots spread on all sides of the mound.
  • New plants should be planted about as deep as they grew originally. The original depth can be determined easily by the band of white at the base of the foliage which indicates the part of the plant which was underground.
  • Do not set the crown (i.e., the point where foliage and roots join) more than 1 inch below the surface of the soil.
  • Work the soil around and between the roots as you cover the plant.
  • Firm the soil and water well.
  • Make sure that there are no air pockets; this can cause the plant to grow poorly.
  • When all the water has soaked in, finish filling in the soil, leaving a slight depression around the plant.

Planting 2

Spacing

Daylilies should be spaced no less than 18 to 24 inches apart on each side.

Labeling

Label each of your daylilies with some type of permanent marker so as to identify them. A plant loses much of its value when its identification is lost.

  What is the difference between diploid and tetraploid daylilies?
Plants all have a basic complement of chromosomes. Most plants are diploiddotthey have two identical sets of chromosomes in each cell. Polyploids are plants with more than two sets of chromosomes. A tetraploid is only one of a whole series of polyploids. Triploids have three sets of chromosomes, tetraploids have four sets of chromosomes, et cetera.
Tetraploid
Tetraploid daylilies are heralded by some growers as having a number of advantages over diploids. In the tetraploid:

  • Flowers tend to be larger.

  • Colors of the flower tend to be more intense.

  • Scapes tend to be sturdier and stronger.

  • Substance of both flower and foliage tend to be heavier.

  • Vegetative vigor in leaf, stem, and flower tend to be greater.

  • Breeding possibilities tend to be greater because of an increased number of chromosomes

Diploid

Diploid daylilies continue to charm growers with their exquisite flower form, grace, and color.

  • Good pink daylilies are still more prevalent in the diploid ranks.
  • Spider and double daylilies are still more prevalent in the diploid ranks.
  • Diploid daylilies are easier to cross than tetraploids.
  • Many diploid daylilies have been converted to tetraploids, thus advancing the tetraploid lines.
  • There are more diploids than tetraploids.

How do I care for my daylilies?

The wise daylily gardener will apply a proper cultural program which includes watering, fertilizing, mulching, possibly spraying, grooming, controlling weeds, and sanitation.

Watering
Water is essential for good daylily performance.
  • Water, supplied in sufficient amounts, almost certainly increases the number and size of daylily blooms.
  • For daylilies, watering is most important in spring when the plants are making scapes and buds, and in the summer during the bloom season.
  • Daylilies benefit more from deep watering, which reaches 8 to 10 inches into the soil, than from a succession of brief, surface waterings.
  • Caution 1: Overhead watering during the heat of the day will cause any open blooms to spot and/or wilt.
  • Caution 2: Watering in the evening can also cause spots on the next day's blooms.
  • Caution 3: Be careful not to over water.
Fertilizing
Daylilies grow in a wide range of soils and conditions.
  • To determine the nutrient needs of your soil, take a soil sample and have it analyzed. Contact your local county agricultural agent for instructions.
  • Daylilies can do well over a relatively wide soil pH range and adjustment of pH need only be considered if the plants appear to be doing poorly. A soil test as recommended above should always be conducted before amending with sulfur or lime.
  • In the average home garden, a single fertilizer application in the spring is usually sufficient, although even that may not be necessary every year.
  • In extremely poor soils or on light or sandy soils which tend to leach badly, more frequent application may be required. Consult with your local agriculture office for recommendations suitable to your soil and climate.
Mulching
Mulching, although not essential in every area, generally does contribute to better daylilies by improving the soil and helping retain moisture.
Grooming
Keep your garden neat and tidy.
  • Many gardeners remove the day's blooms at the end of the day to give their gardens a pristine appearance.
  • If you hybridize, expect to leave the pollinated blooms on the plants until the blossom sheds and the tiny seed pod is formed.

The above daylily questions and answers have been summarized from The Illustrated Guide to Daylilies, a publication of the American Hemerocallis Society (AHS).

Saturday, July 25, 2015

A Visit to the Most Beautiful Garden in the World

Butchart Gardens 2015

summer-full-gazing-ball


I take very few vacations, but when I do, it is to see another garden. This year my husband and I went yet again to visit Butchart Gardens on beautiful Vancouver Island, British Columbia.  The gardens receive close to a million visitors each year. The gardens have been designated a National Historic Site of Canada due to their international renown.

In 1907, 65 year old garden designer Isaburo Kishida of Yokohama came to Victoria, at the request of his son, to build a tea garden for Esquimalt Gorge Park. This garden was wildly popular and a place to be seen. Several prominent citizens, Jennie Butchart among them, commissioned Japanese gardens from Kishida for their estates. He returned to Japan in 1912.

In 1909, when the limestone quarry was exhausted, Jennie set about turning it into the Sunken Garden, which was completed in 1921. They named their home "Benvenuto" ("welcome" in Italian), and began to receive visitors to their gardens. In 1926, they replaced their tennis courts with an Italian garden and in 1929 they replaced their kitchen vegetable garden with a large rose garden to the design of Butler Sturtevant of Seattle. Samuel Maclure, who was consultant to the Butchart Gardens, reflected the aesthetic of the English Arts and Crafts Movement.

In 1939, the Butcharts gave the Gardens to their grandson Ian Ross (1918–1997) on his 21st birthday. Ross was involved in the operation and promotion of the gardens until his death 58 years later. When Robert died in 1997, a son, Christopher, took over, expanding the gardens and its staff to 240.

It was Christopher who began the weekly fireworks shows in summer when most of the tourists show up, choreographing lights and music in a Disney-esque display. Christopher died in 2000, and since then the shows have ended with flickering firelights spelling a salute to him: "Good night, Christy."

Christopher's sister Robin-Lee Clarke, presently carrying on the Butchart tradition at the gardens. Barnabas Butchart Clarke, 34, the only child of Robin-Lee and David Clarke, and great-great-grandson of the founders, represents the youngest generation in the Butchart tradition of family management. He lives in Victoria and produces dance shows.

This was our third trip and I dare say not our last.  It is truly spectacular. I have a few pictures posted here for you to armchair travel a bit. Just sit back with a cuppa tea and enjoy.

The Views 


spring-full-sunken-garden

spring-full-sunken-garden-lake

20150720_114119(3) summer-full-fountain

summer-full-sunflowerssummer-full-private-garden

The Tourist 


IMG_20150720_112227(2) 20150720_115003-1(2) 20150720_115051
 

The Roses 

  20150720_113201(2) 20150720_113421(2)  20150720_113542 20150720_113134(2) 

20150720_113902   20150720_114138  20150720_114655 20150720_114813-001

 20150720_113134 20150720_113201(3) 20150720_114847


The Water Features 

IMG_20150720_110920        IMG_20150720_110929(2)

IMG_20150720_115501     IMG_20150720_121005

The Containers

IMG_20150720_111057            IMG_20150720_111338(3) 
IMG_20150720_111143(2)   IMG_20150720_111250

The Hanging Baskets

20150722_100813(2)  IMG_20150720_112317(2) 
 IMG_20150720_112337(2)      IMG_20150720_112556(3)
 IMG_20150720_112325(3)  IMG_20150720_112719   IMG_20150720_111326(2)


The Tuberous Begonias

 IMG_20150720_112424(2) IMG_20150720_112435(2) IMG_20150720_112449(3)   IMG_20150720_112506(2)  IMG_20150720_112544IMG_20150720_112347 IMG_20150720_112413(2) IMG_20150720_112424     IMG_20150720_112648 IMG_20150720_112655 IMG_20150720_112703(2)  IMG_20150720_112347(2)

The Flowers

20150720_113351(3)  20150720_113706-001  IMG_20150720_111057(2)
IMG_20150720_111221(2) IMG_20150720_112053(2)

#hashtags# gardens# flowers# beautiful plants# roses# trees# Vancouver Island# famous gardens# hanging baskets# containers# lush gardens#